Bought yourself a shiny new Android phone over the holidays? Or got one as a gift this Christmas? You might need some help familiarizing yourself with the interface or a few tips that will help you make the best out of your new purchase. That’s exactly what you’re going to find in this article! Whether you switched from the dark side and are new to Android or just upgrading from an older model, we’ll tell you the first 10 things you should do with a new Android phone to ensure you have the best experience. So, grab your phone, sit back, and follow these simple steps to customize the device to its full potential!
Navigate this article:
- Sign in with your Google Account
- Restore a Backup or Transfer Data from your older phone
- Customize your Homescreen with Launchers, Icons Packs, Widgets, and Wallpapers
- Uninstall Bloatware from your Carrier or OEM
- Change Navigation Style
- Customize Quick Toggles
- Change Animation Speed to 0.5X
- Enable Dark Mode
- Setup Digital Wellbeing
- Link your Android Phone to a Windows PC
1. Sign in with your Google Account
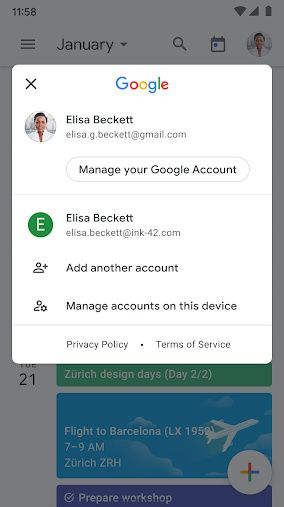
Since Android is a part of Google, a lot of services on an Android phone rely on a Google account. You need a Google account to install apps, use Google’s services like Gmail and YouTube, and sync your data to the cloud. When you switch on your brand new Android phone for the first time, you will be greeted with the setup process. Once you’ve entered basic details like your Wi-Fi password, you will be prompted to log in with your Google Account on the device. If you already have one and you were using it on your older device, it’s best to use sign-in with the same ID. This way, you will be able to sync your data from your old device to your new one and even restore a backup from the cloud.

If you don’t have a Google Account, you will be given an option to create one during setup. While you can skip this step and create one later, it’s highly recommended that you create one at the time of setup since pretty much everything you do after this step on your phone would require a Google account. You can also sign into multiple accounts if you have separate IDs for personal and work use. If you use other email providers like Yahoo or Microsoft, you can also sign into those email IDs during the setup process.
Your Gmail ID will be used to sync your data across devices which can be useful. When you store a contact on your Android phone, for example, it will be synced to your Google Account which can be accessed from anywhere on any device. If you also have a smartwatch or an Android TV, signing in with the same Google ID on all devices will give you a seamless experience.
2. Restore a Backup or Transfer Data from your older phone
If you’re switching from an older device, be it Android or an iPhone, you will be given an option to transfer all your existing data from your older phone to your new Android phone. This includes all your apps, photos, videos, files, contacts, messages, etc. This is a great way to ensure all your data is intact even on the new phone and you won’t really lose out on any important photos or contacts.

If you don’t have your old phone anymore, Google even gives you an option to restore a backup from the cloud. If you had auto-backup enabled on your old phone, Google automatically backs up data from your phone like the pre-installed apps, call log, device settings, etc., and syncs it with your Google Account. You can restore this backup on your new Android phone by signing in with the same Google Account as your old phone and then choosing the device from which you want to restore the backup.

Several OEMs that provide their own custom UIs on phones even have their own proprietary data transfer software that you can use to bring your data from your old phone to the new one. The instructions differ from phone to phone but they will be listed on the screen during the setup process and are easy to follow.
3. Customize your Homescreen with Launchers, Icons Packs, Widgets, and Wallpapers
Android is known for its customization options so it’s only fair that you make use of it to its fullest. If you’re someone who likes to change the way the software on your phone looks to suit your style, the best way to start doing so is by customizing your homescreen. This is the screen that you see as soon as you unlock your device. It’s the screen you see before you launch any app, so it’s got to look good.

The simplest way to change the look of your homescreen is to use a nice wallpaper. There are several wallpaper apps on the Play Store that you can use to download beautiful wallpapers for your homescreen. Pro tip: If your phone has an OLED display, try to pick a wallpaper with a black background since it will look great and also help you save some additional battery.
Once you’ve changed the wallpaper, you might want to get a matching icon pack with it. The key to a good-looking homescreen is a nice wallpaper accompanied by an icon pack that complements it. If you have a dark wallpaper, a white icon pack will create a great level of contrast and give you a monochrome look.


Another way to customize your homescreen while also adding extra functionality is to use widgets. Widgets can display useful data like the Weather, upcoming calendar events, reminders, etc., and also add to the overall aesthetic of your homescreen. There are several apps like KWGT and UCCW that even let you create custom widgets and change the way they look to suit the other elements on your homescreen.
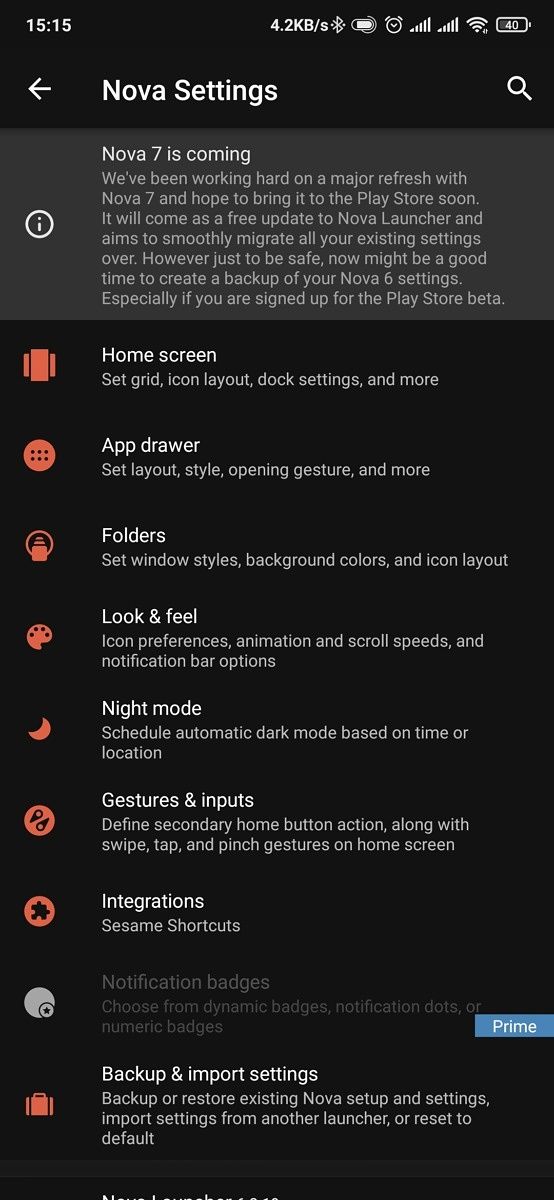
If you want to go one step further, you can use a custom launcher to tweak more minute aspects of your homescreen like the app grid and the app drawer. You can change the background for folders, add swipe gestures to perform certain functions, and even modify the transition effects while swiping between homescreens. The best way to familiarize yourself with all the features is to download these apps and try them out for yourself and then decide which one suits your needs. There are literally unlimited permutations and combinations that you can try on your homescreen so go wild!
KWGT Kustom Widget Maker (Free+, Google Play) →
UCCW - Ultimate custom widget (Free+, Google Play) →
4. Uninstall Bloatware from your Carrier or OEM
Depending on which phone you buy and where you buy it from, your new Android phone might come with some pre-installed apps that may not be useful to you. These apps are generally referred to as bloatware. This is because they stay on your phone and occupy storage while utilizing resources that can be allocated to apps that you actually use. Hence, it’s a good idea to uninstall all the apps that you don’t use on your phone.

Some pre-installed apps can be uninstalled by default while some that are carrier or OEM-specific may not have the uninstall option. You can delete those apps too by following our how to uninstall carrier and OEM bloatware guide. In general, it’s recommended to install and keep only the apps that you need and use on your phone. If there’s an app that you don’t use at all, you should uninstall it.
5. Change Navigation Style
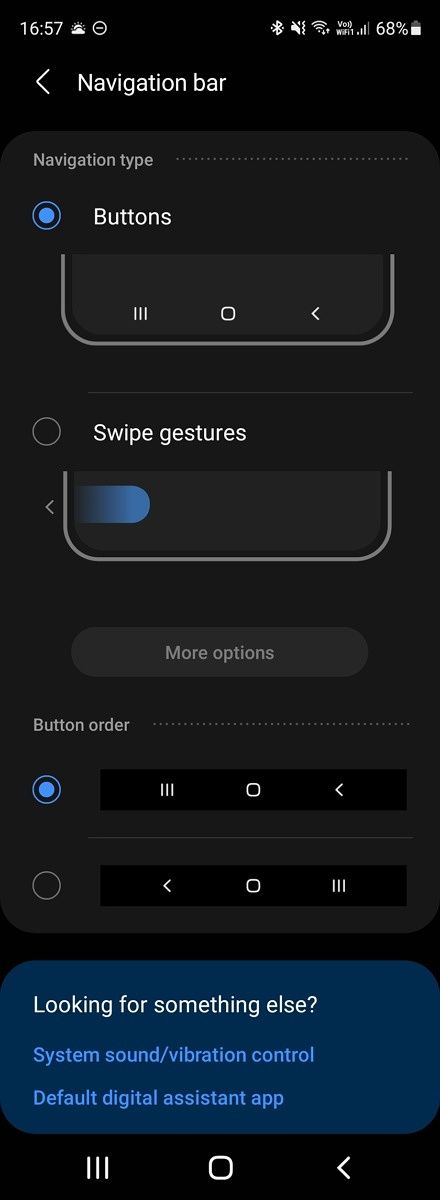
Up until Android 9 Pie, Android used a three-button navigation bar to go back, home, and to access recent apps. With evolving phone designs and emphasis on edge-to-edge displays, though, the default navigation mechanism on most Android phones nowadays is gestures. While gestures are convenient, some people may still prefer the older button-style navigation bar at the bottom of the screen. Or if you’re coming from an iPhone, you may prefer gestures over the buttons. Either way, you can try out both and then decide which one you want to keep.


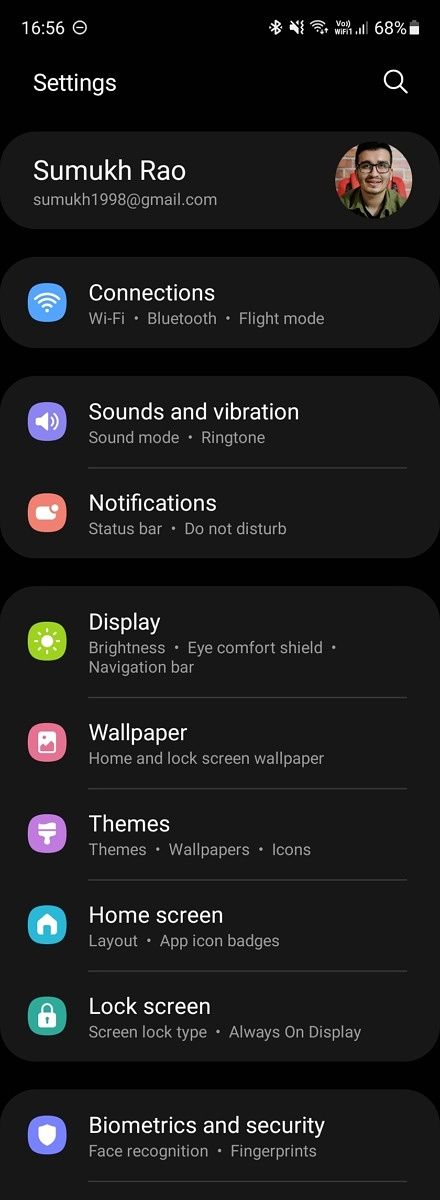
Head over to the Settings app on your phone and tap on the search bar at the top. Now, type in navigation and you should see results along the lines of System navigation and Gestures or something similar. The setting may vary based on the skin of Android you’re using, but the name should be more or less similar on all devices. From here, you can try out both the navigation bar and the gestures to see which one you find more convenient.
6. Customize Quick Toggles
When you drag down the notification bar on Android, you would be able to see a few toggles at the top of the screen for Wi-Fi, Bluetooth, Airplane Mode, etc. These are referred to as quick toggles. Dragging down once more should expand this region and give you more toggles for various other settings and features. This is the area that can be quickly accessed whenever you want to change some setting regardless of what app you are in. Hence, customizing it to show the toggles you use most often will make your experience more convenient.

To do this, swipe down on the notification bar and then swipe down on it once again to reveal all the quick toggles. Here, you will find multiple toggles arranged in random order. At the top right corner of this screen, you will find an Edit option next to the Settings button or a set of three dots which you can tap on to find the Edit Buttons/Layout option.


Tapping on it will let you rearrange your toggles in the order you want them. The first few toggles are what appear on the first row when you drag the notification bar down once. These should ideally be the toggles you use most often. You can set the first few toggles for Wi-Fi, Bluetooth, Mobile Data, Flashlight, Auto-rotate, and Battery Saver. These are the ones I use most often which is why I like having them at the top.
You can also swipe through multiple pages in the quick settings panel and add extra toggles. For example, I’ve added a toggle to trigger Shazam that can detect what song is playing in the background, and a toggle to turn on and turn off all my smart lights. You can choose from the list of available toggles and add whichever ones you find useful to the quick settings panel.
7. Change Animation Speed to 0.5X
Smartphone processors have gotten really fast in recent times so no matter which phone you buy, you should be able to get decent performance out of it at least while doing basic tasks. That, coupled with a high refresh rate display like a 90Hz or 120Hz panel means you’re going to get a smooth experience while using the phone. However, there’s a quick hack that can make your experience even smoother while using any Android device. It’s a basic trick that has been around for years now but it’s still very much effective.
Every phone has animations across the UI. Whether you’re opening an app or switching between multiple apps, there are animations in between to make the experience smooth. However, those animations can make your phone feel slightly slower. This trick will let you speed up the animations, in turn resulting in a snappy experience.

All you have to do is head over to Settings > About Phone and tap 7 times on Build Number. This will enable Developer Options on your Android phone. Now, head over to Developer Options and scroll down till you find these three options: Window animation scale, Transition animation scale, and Animator duration scale.
Tap on all of these options and change the Animation scale to 0.5X. Now, reboot your device and you should instantly see animations being faster and your phone should feel more snappy and quick. Note that this doesn’t actually speed up your phone, but since the animations end quicker now, it does trick your brain into believing your phone is now “faster”.
8. Enable Dark Mode
A lot of modern phones nowadays come with OLED displays. One of the advantages of an OLED display is the deep blacks and excellent contrast levels while viewing content on the display. The way it does this is by turning off pixels entirely in the region where something black is being displayed. As a result, it also ends up saving battery life since the pixels are turned off and there’s no power required to run that part of the display. This is also the reason we recommended using a dark wallpaper above if you have a phone with an OLED display.

This is also the reason you should enable Dark Mode on your Android phone. There are two main advantages of doing this. If your phone has an OLED display, you will end up getting a little extra battery life. It may not be significant, but even a 10% increase should be helpful. Secondly, dark mode is easier on your eyes, especially at night. A bright, white background can be quite harsh to look at especially if you use your phone a lot in the dark.
To enable Dark Mode on your Android phone, head over to Settings > Display > Theme > Dark. The exact setting may vary depending on which device you have, but you should find it under the Display section within the Settings app.
9. Setup Digital Wellbeing
Digital Wellbeing is a great way to limit your phone usage by setting time limits for certain apps and checking how many times you’ve used your phone and to do what. If you’re addicted to social media apps or games on your device, this is a great way to stay away from your phone and set restrictions.


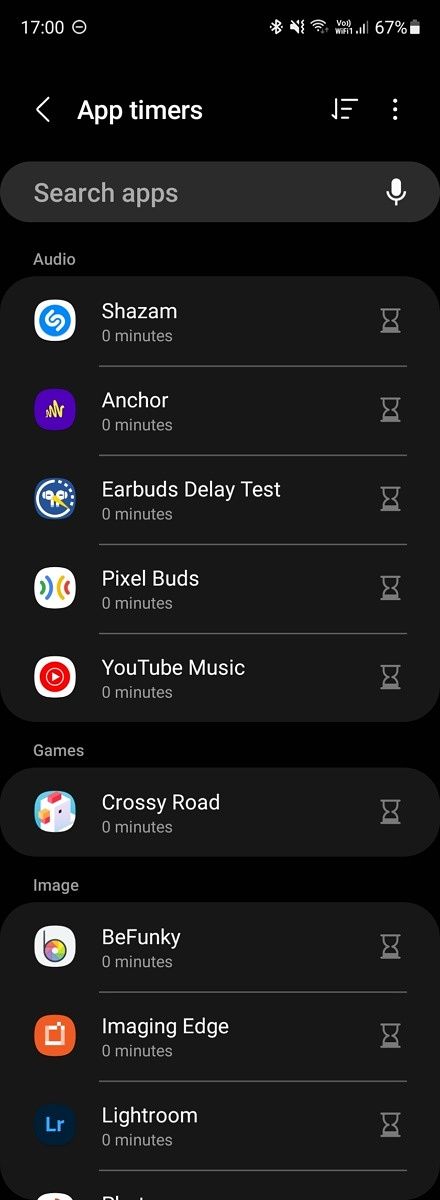
Open the Settings app on your phone and scroll down to Digital Wellbeing. Here, you should find detailed information about how you’ve used your phone and for what duration. You can set a goal for your screen time, set app timers after which an app can’t be opened, and even add focus modes and a bedtime mode to keep yourself away from your phone before going to bed. A digital detox is quite essential from time to time and Digital Wellbeing lets you do exactly that.
10. Link your Android Phone to a Windows PC
One of the biggest advantages of using an iPhone with a Mac is just how well everything integrates together. You can accept calls on your iPhone via your Mac, respond to iMessages directly from the Mac, and even copy something on your iPhone and paste it on the Mac. Well, you would be surprised to know that you can achieve something similar using the Your Phone app on your Android phone and on a Windows PC.

All you have to do is download the Your Phone Companion app from the Play Store and follow the on-screen instructions to link your device with your Windows PC. Once done, you will be able to receive your phone’s notifications on your PC, copy files easily, have a common clipboard, etc. If you have a Samsung phone, the integration with a PC is even better as you get more features.
Your Phone Companion - Link to Windows (Free, Google Play) →
So, what are you waiting for? Grab your brand new Android phone and get to work! Customize the device to make it your own and follow all the simple tricks to get the best out of your device. Which of these tips did you like the best? Let us know in the comments below.
If you have bought yourself a different device, check out our other tutorials:
The post First 10 things to do with a new Android Phone appeared first on xda-developers.
from xda-developers https://ift.tt/3eMR51C
via
IFTTT